Tasks are the main form of actions in Zephyr Project Manager and represent the essential actions that need to be completed. You can set the title, description, start date, end date, assignee and assigned project for each task.
Creating a task
You can create a new task by:
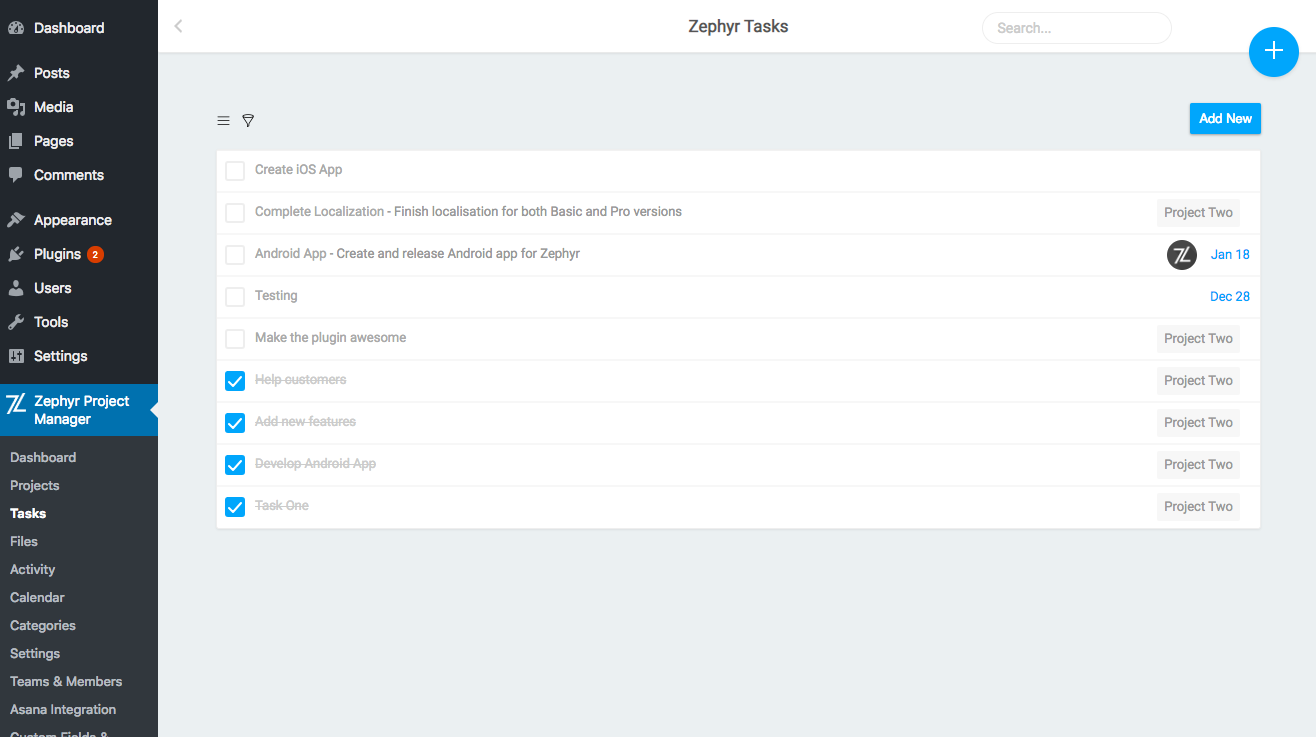
- Navigating to the Zephyr Project Manager page in the dashboard and clicking on the QuickMenu button (the blue circular button in the top right corner of the page).
- From the menu, click on the New Task option.
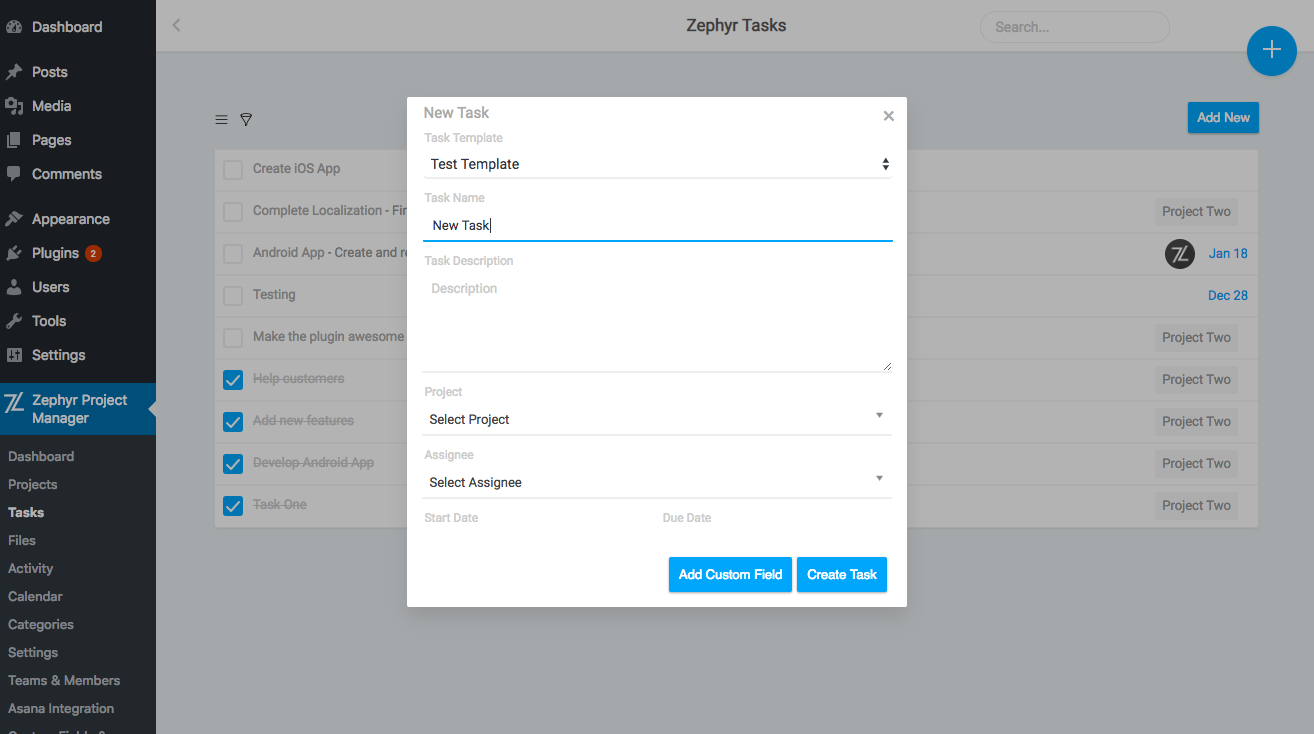
- Enter the details in the popup window that appears and click on the Create Task button to save the task
In addition to the method outlined above, you can also create a new task from the Zephyr Project Manager > Tasks page by clicking on the New Task button, or in the project overview under the Tasks tab to create a task quickly for a certain project.
The fields for the new task are shown below:
- Task Name: The name of the task
- Task Description: The text description of the task to explain it in further detail
- Project: The project that the task is assigned to or you can leave it unassigned
- Assignee: The user that the task is assigned to or you can leave it unassigned
- Start Date: The date that the task should start on
- Due Date: The estimated end date for the task or the deadline
- Custom Fields: Custom fields are only available in the Pro version and allow you to add customized data to each tasks to make them unique to your project.
Editing a task
You can edit and change task details by clicking on a task to view the details and pressing on the Edit Task button. You will be taken to the edit page, where you can change the details of the task and press the Save Changes button to save the changes as shown in the example below.
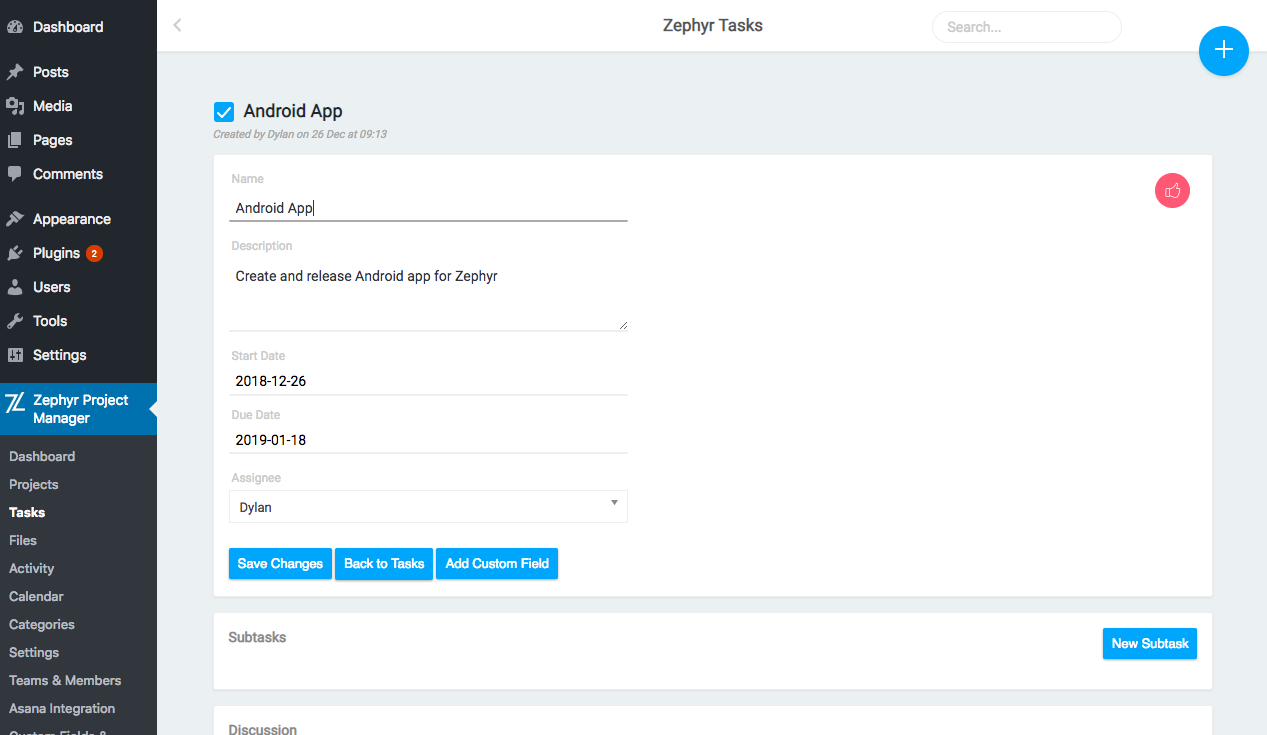
You can also mark tasks as complete or incomplete by clicking on the checkbox next to them.
Deleting a task
You can delete a task by clicking on the options button when viewing a task in the Tasks page and selecting the option labelled Delete Task.
Copying a task
You can copy a task by clicking on the options button when viewing a task in the Tasks page and selecting the option labelled Copy Task. This will open a popup where you can change the title of the copied task and include/exclude which details will be copied. You can choose to include or exclude the following elements of a task:
- Task Description
- Assignee
- Subtasks
- Attachments
- Start Date
- Due Date
Confirm the new task by clicking on the Create New Task button.
Converting a task to a project
You can convert a task to a ticket by clicking on the options button when viewing a task in the Tasks page and selecting the option labelled Convert to Project. This will open a popup where you can change the title of the new project and select/deselect which details will be included. You can choose to include or exclude the following elements of a task:
- Task Description as Project Description
- Subtasks as Project Tasks
- Assignee as Project creator
Confirm the new project by clicking on the Convert Task button.
Subtasks
Subtasks allow you to further branch out tasks into more organized, multi-step actions. You can create Subtasks when viewing any particular task under the Subtasks section of the project. You can click on the New Subtask button to create a new subtask, mark subtasks as complete, edit subtasks by clicking on them or deleting them by pressing on the Delete button next to them.
Exporting & Importing tasks
You can export and import tasks to and from CSV/JSON files.
To export tasks, you can either export specific tasks individually by hovering over the Export Task option in the task options, and selecting on the desired format – either CSV or JSON.
You can export all the tasks by going to the Tasks page and clicking on the options icon in the top-left side of the task list, hovering over the Export Tasks option and selecting the required format.
Importing tasks are essentially the same, however instead of clicking on the Export Task option, you should click on the Import Task option and then you will be able to select the file you want to import. You will be shown which tasks were imported and other details after selecting your file.
The format for the headers should be the following (note that the fields not needed can be left empty, so they are all optional, but the headers are required):
ID,Parent ID,Created By,Project,Assignee,Name,Description,Completed,Categories,Date Created,Due Date,Start Date,Date Completed
- ID: This is the ID of the task. If left empty, it will create a new task, otherwise it will attempt to update the task with the same ID in Zephyr with the data you provided.
- Parent ID: The ID of the parent task if you would like it to be a subtask of a different task.
- Created By: The user ID of the user who created the task. If left empty it will automatically use the ID of the user importing the file.
- Project: The ID of the project to assign it to.
- Assignee: The user ID or comma separated list of user IDs to assign the task to
- Name: The name of the task.
- Description: The description of the task.
- Completed: Whether the task is completed or not. Leave empty or set to ‘0’ for ‘Not Completed’ and ‘1’ for ‘Completed’.
- Categories: To assign the task to categories, you can pass the IDs of the categories here.
- Date Created: The date the task was created. If left empty, it will just use the current date that you import it on. Format: yyyy-mm-dd H:i:s (example: 2021-09-12 16:00:00)
- Due Date The due date of the task. Format: yyyy-mm-dd H:i:s (example: 2021-09-12 16:00:00)
- Start Date: The start date of the task. Format: yyyy-mm-dd H:i:s (example: 2021-09-12 16:00:00)
- Date Completed: The completed date of the task. Format: yyyy-mm-dd H:i:s (example: 2021-09-12 16:00:00)
Below is an example CSV file with the correct format and 2 example tasks to download.
Download Example Task Importer CSV
Filtering tasks
You can filter tasks in the Tasks page by clicking on the filter icon at the top of the list and selecting the filter. The following filters are available:
- All Tasks: This will display all tasks
- My Tasks: This will display only tasks assigned to you
- Incomplete Tasks: This will display all incomplete tasks
- Complete Tasks: This will display all complete tasks
Printing a task
You can print a task by clicking on the Print option in the task options (the option icon in the task view modal). This will provide you with a preview of how the task will look and open the printing page.