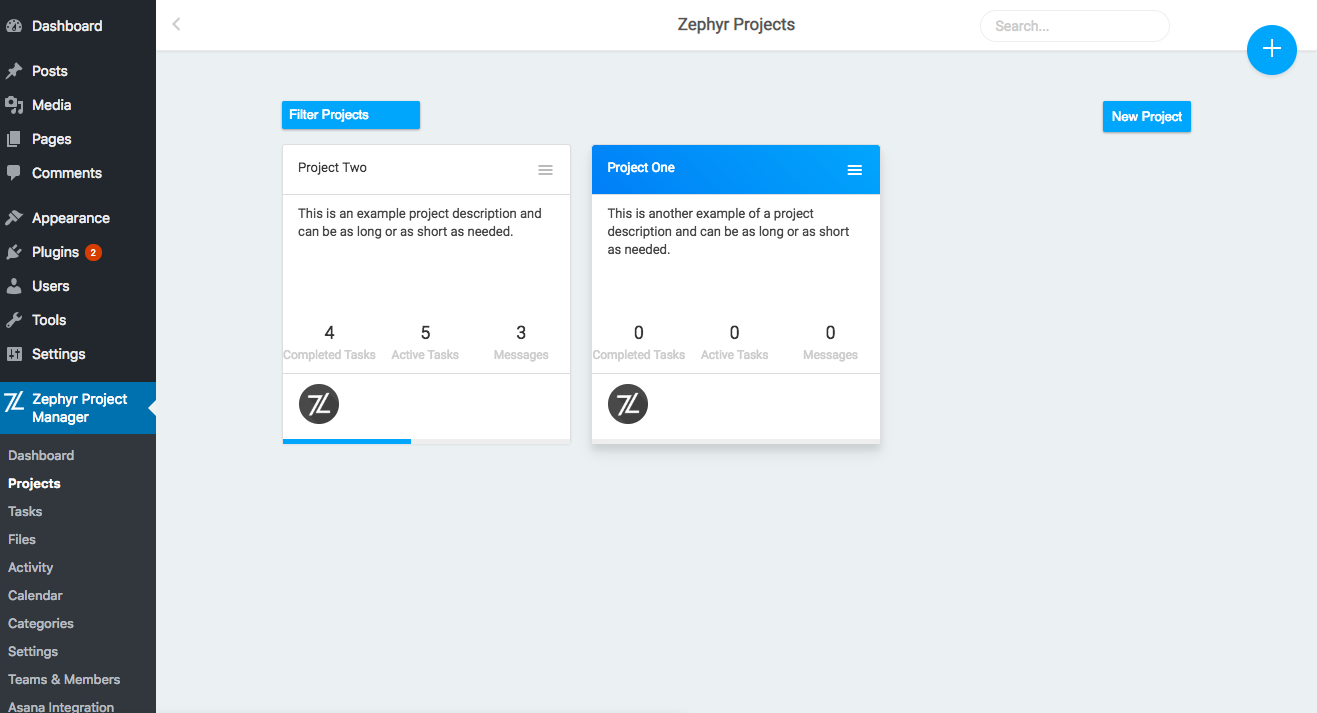
Projects are the main blocks of project management and allows you to group tasks together, follow progress, discuss project related details and view the progress easily by a quick look.
Creating Projects
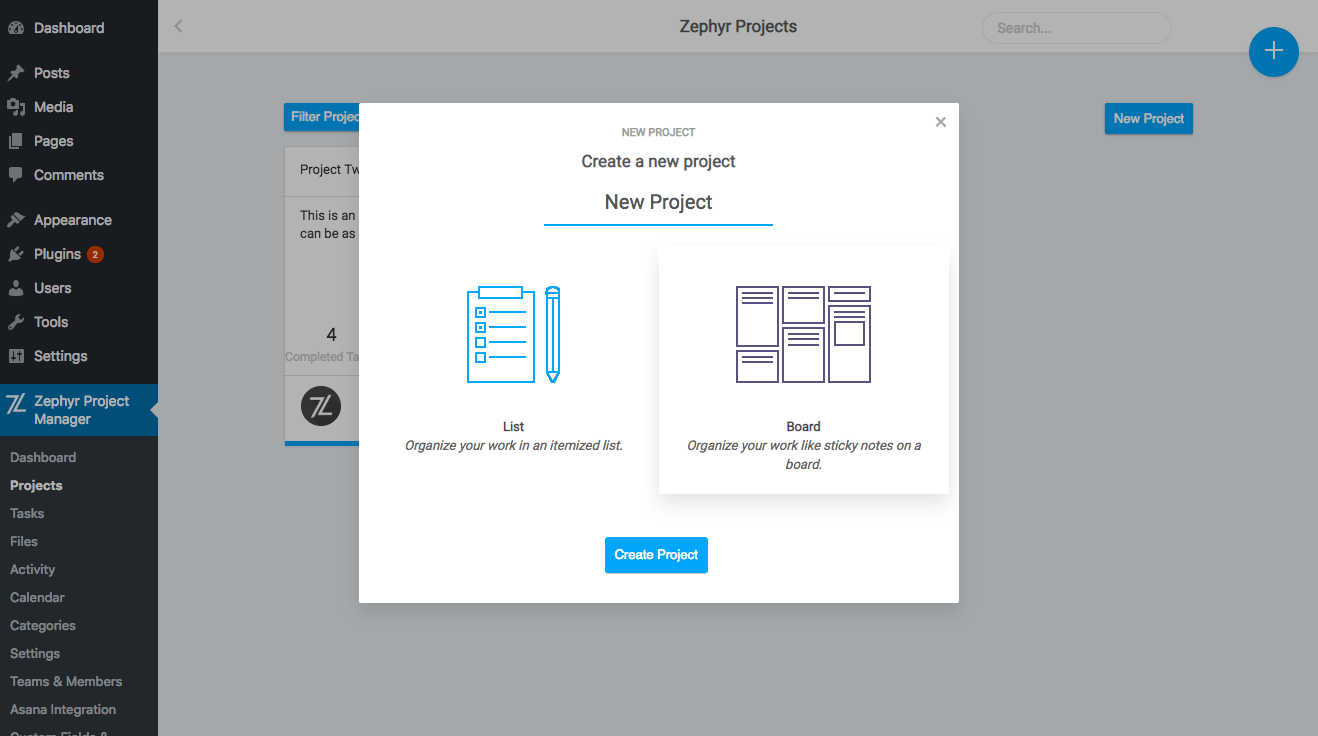
You can create a new project by clicking on the Quickmenu button (the blue circular button in the top-right) and clicking on New Project. This will open a screen to create your project and allows you to add the name of the project and the type/layout. The only type/layout available in the free version is the List layout, however the Kanban view is available in the Pro version of the plugin.
After entering the name, click on the Create Project button to create the project. You can view the projects on the Zephyr Project Manager > Projects page.
Editing Projects
You can edit projects by going to the Projects page and clicking on the title of one of the projects in the grid and clicking on the Go to Project button at the bottom of the popup. This will take you to the main project view where you can edit the Name, Description, Start Date, Due Date and assigned Categories of the project. You can also view the project tasks, the project discussion and project progress on this page.
Click on the Save Changes button to save the changes made or on the Back to Projects button to return to the Projects page.
Deleting Projects
You can delete a project by going to the Projects page and clicking on the options icon of the project you want to delete (the horizontal bar icon in the top-right of a project). This will open the option list and you can delete the project by clicking on the Delete Project option.
Copying a Project
You can copy a project by opening the project options dropdown in the Projects page and selecting the Copy Project option.
This will open a popup to enter the name of the new task and choose which elements of the projects you want to copy. The following elements can be included/excluded:
- Description
- Tasks
- Attachments
- Start Date
- Due Date
Click on the Create New Project button to create the new project.
Project Discussions
You can add or join a discussion of a project by going to the Project View page, which you can do by clicking on the project in the Projects page and clicking on Go to Project. Under the Discussion tab you can chat, and add multiple attachments and see other users messages and download their attachments.
Exporting & Importing Projects
You can export and import projects to and from CSV/JSON files.
To export projects, you can hover over the Export Project option in the project options dropdown, and select the desired format – either CSV or JSON.
Two files will be downloaded after clicking on the export option – one for the project and the other for the project’s tasks.
Importing projects are essentially the same, however instead of clicking on the Export Project option, you should click on the Import Project option and then you will be able to select the file you want to import. You will be shown which projects were imported and other details after selecting your file.
Adding Projects to the Dashboard
You can add projects to the dashboard to easier keep an eye on important projects at a glance by opening the project options and selecting the Add to Dashboard option. The project will now be displayed in the Dashboard page with the project’s progress easily visible.
You can remove projects from the Dashboard by clicking on the cross in the top-right corner of the task in the Dashboard page.
Project Status
You can add a text status for the project as well as a status colour (either red, green, or yellow) to let everyone know where the project stands. This can be done from the Project View page, which you can access by clicking on a project in the Projects page and clicking on the Go to Project button. Under the Progress tab you will see the status and project sections. The Progress section displays a chart of completed, incomplete and pending tasks over the last few days.
You can change the status by selecting a colour and entering a text description and then pressing Update Status.