(Note: This feature is only available in the Pro version)
Custom Fields allow you to customize your tasks to your project needs by allowing you to define custom fields and field types and adding them to your tasks.
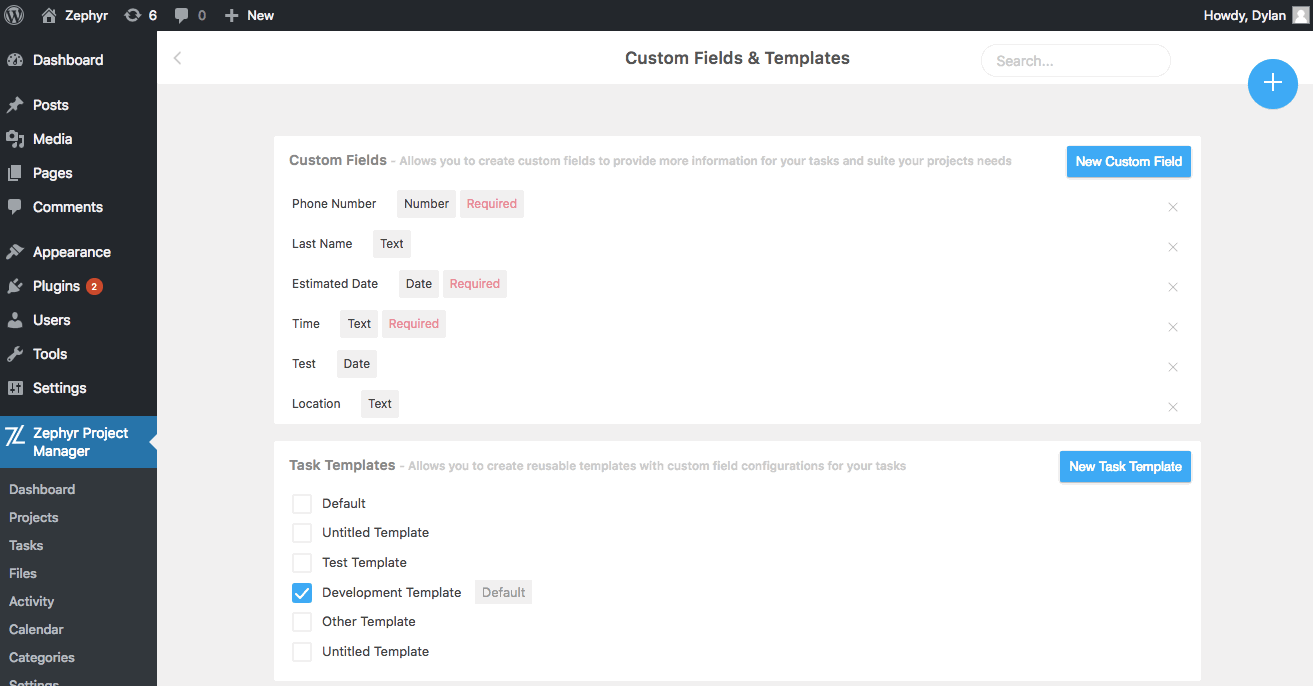
Creating Custom Fields
To create a custom field, navigate to Zephyr Project Manager > Custom Fields and click on the New Custom Field button.
A modal will be displayed with the following custom field options:
- Name: This is the title and label of the custom field
- Type: This is the type of field. You can select between one of the following types:
- Text Field: A normal text field
- Number Field: A field that takes a number
- Date Field: Displays a datepicker field which the users can select a date from
- Select Field: Displays a select field with custom values you can add
- Note: more field types are coming soon. Let us know if there are any types you would recommend.
- Default Value: The value that is used if no value is provided when added to a task
- Required: Whether or not the field is required
Click on the Create Custom Field button to create the custom field.
Adding Custom Fields to Tasks
You can add your created custom fields to new and existing tasks by clicking on the Add Custom Field button in the task creator modal or the task edit page. You will then be greeted with a list of your custom fields to select from and you can add your value and save the task.
Deleting Custom Fields
On the Custom Fields page you can delete custom fields by clicking on the cross icon next to the custom field.
Task Templates
You can create task templates to create reusable and customizable custom field configurations to reuse for your tasks.
You can create a new task template by clicking on the New Task Template button and then creating a name for the template and adding your desired custom fields.
After creating the task template you can click on the checkbox to the left of the Task Template to set it as the default template if you wish to do so.
When creating a new task you can select a task template under the ‘Task Template’ label to use your template.
